It is the middle of February and I can’t wait to get to the marina and finish up a couple of projects on our boat. Besides routine items like zinc replacement and cleaning,
I have more electronic work to finish. In the last issue, I described how I upgraded the electronics after our GPS failed. I took advantage of an end-of-season sale for all of it.
New radar, radar mount and a camera are calling to me to come out in the cold shop and get the preparations done for installation.
Who am I to turn a deaf ear to them? So, when it’s not too cold I head out into the unheated shop and fit it all together, as much as I can so that when I bring it to the boat it goes together easily (hopefully)! I started on the cockpit camera last fall before putting the boat away. I scoped out a mounting spot for the camera that covers all the seating areas in the aft cockpit and hooked up (temporarily) the data cables to the smaller MFD just to make sure I had a picture. This spring the hardest part will be running the cable from the hardtop to the helm, including the radar cables.
I started putting the radar mount together sometime in the late fall and modified it to mount the white running light on the top of it. The hardtop has a stainless-steel light pole towards the back with a light mounted on it but the radar mount will be directly in front of it and is higher. It only makes sense to remove that light pole and install a new navigation light onto the radar mount. I’ll remove the light pole this spring and fill the holes with white Marine Tex, sanding it down so it was never there.
The area on the radar mount where the new navigation light is being mounted was only Starboard, and not very thick. I was worried that when the boat was shrink-wrapped, that the light and mounting plate would support a good deal of weight possibly cracking the Starboard.
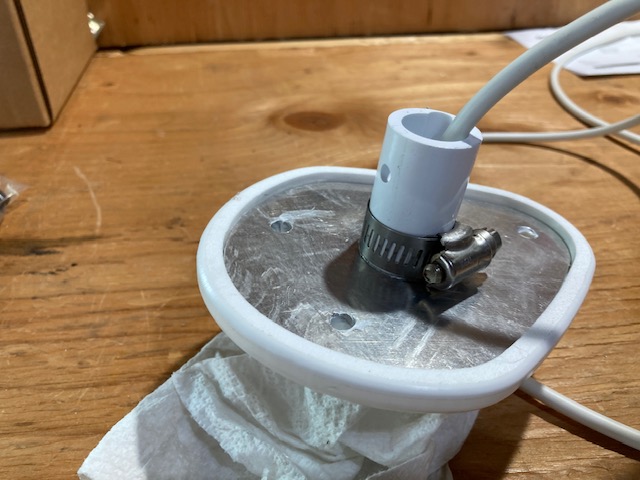
With that in mind, I fabricated an aluminum plate to fit under the Starboard that will handle any load from the shrink wrap and snow weight. I will also make up a small PVC pipe with a cap on it to cover the navigation light, transferring any weight to the mount and not the light.
Next up is fitting the new dome radar onto the mount. This is very straightforward if not a little tedious. The mount has a nice watertight rubber gland to seal the data and power cables off where they enter the mount. That gland is right between the support braces for the radar mounting plate, and is not very easy to access especially if a radar is mounted there while you are working up on the hardtop! To work around that I am getting everything set up on my bench. Once I have the radar located on the mounting plate, I can determine how long to keep the cables outside of the rubber gland.
I just need enough to attach the cables to the radar and then lay the unit flat to bolt up.Then leaving the cables in place but removing the radar I can tighten up the rubber gland. The remaining twenty-five feet of cable I will leave coiled up and running out of the bottom of the mount.
There is a Starboard base plate that goes under the mount that I can use as a drill guide when positioning the mount so I don’t need to carry the radar mount/ radar up onto the cabin top until all holes are drilled or filled.
Once the shrink wrap comes off, I can start removing the old radar. By removing an overhead panel in the arch I can get to all the nuts securing the unit, and the radar and navigation light wiring. At this time, I can install the cockpit camera and run all the wiring at the same time. The new radar mount will cover the old mounting holes but not line up allowing me to use them again. So, I will fill the old holes with Six10 epoxy but I don’t have to go crazy for cosmetic purposes. Once covered they will never be seen again unless someone removes the radar mount for some reason.
But they will be waterproof, we can’t let the coring get wet and turn to mush! Even the new holes should be made waterproof by enlarging the core material and filling it with epoxy. I can use my rotary tool with a barrel grinder to remove the coring.
Again, the Six10 epoxy works so well because it does not sag. Then using some silicone sealer should keep it all dry until someone takes it apart!
After all holes are filled and the units are mounted, the next part is to snake the wiring to the helm. Going down the inside of the arch is easy, but I have not yet found where in the engine room the wires will appear, or where I can send them up into the helm area. Time will tell!