After what seemed like an uphill battle, we launched Take Five and are ready for another season afloat. To me, it feels like everything I need and want to accomplish happens at the same time in the spring and fall. Spring: Prepare the boat, including installing the after coolers and the new oil pressure sensor. Get the lawn fertilized, get the house set for summer, including taking out the patio furniture. Drive south to see our new grandson. Winter: Do all the above but in reverse. Except driving south, no complaints there!
This spring was a hard one with the bad weather we have had. Lots of rain and I wanted to keep the shrink wrap on as long as I could. It helps keep all the pollen off the boat. But I could not fit all the engine parts through the zippered opening, so it had to be removed.
The oil pressure sensor was a slight challenge. Not to change it, really, but to find it. According to the Cummins part manual, it is on the left side of the engine block, behind a plate on which the engine electronics are mounted. It shows the sensor screwed directly into the engine block. Pretty straightforward so far. I ordered the new sensor last winter and started that replacement first. Since it is mounted on the left side of the engine and it was the port engine that needed the work, I started looking at the starboard engine just to find it.
I removed the electronic mounting plate and saw a sensor, but it was totally different from what I had for a replacement. I continued looking all over the left side of the engine, but found nothing close to it, other than the one that looked different. I placed a call to a Cummins dealer and gave him my engine serial numbers and told him what was going on. He verified that indeed I had the correct sensor and that the old one had been superseded. Not only did it look different, it was not screwed directly into the block but instead it was installed on a ninety-degree pipe fitting.
Armed with that information, I went out and started working on the port engine.
This involved me lying down across the top of the engine, almost upside down. If you need to wear glasses, you would understand the problem of being in that position, working up a sweat and having your glasses slide up onto your forehead. With the sweat drops accumulating on the lens to boot. The work is in focus, now it’s not!
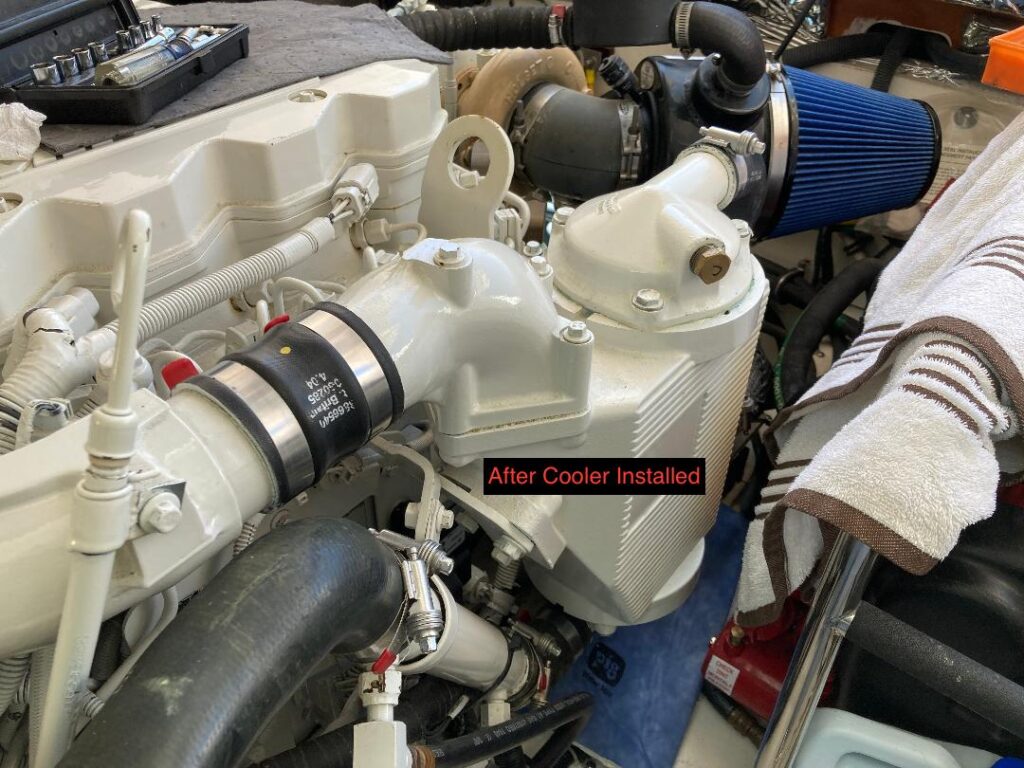
At least all the time spent exploring this problem on the starboard engine paid off, the job went fairly quickly without a hitch, and no leaks either! With that done, it was time to install the after-coolers that I serviced over the winter. I’m not sure what they weigh, but they are bulky. The starboard engine is easy to install. I can stand right next to the engine with no problem. The port engine is another story. Since the after cooler is on the left side of the engine, that places it on the outside of the port engine. Meaning I had to lean over the engine to install it. Lucky for me, I had left some of the larger hose connections installed on the engine and I was able to slip the after-cooler into those hoses to take up some of the weight. Having had a few of the bolts ready to go, it was easy to reach over and start a bolt to secure it in place. After a few hours, I was done with the installation. I did double-check all the hose clamps and bolts before I was comfortable with calling the job done.
As an early Father’s Day present, my family had the hull waxed for me. And they volunteered to help me detail the topsides. That leaves the bottom painting and the zinc installation. After waiting almost a week for a good weather window, I went out to install the zincs. When I got to the boat, I was pleasantly surprised to see the crew painting the bottom. They were working by the bow and I wondered if I would be able to get to the zincs with them working. I did not need to worry as they had already painted the rest of the hull, and they also had painted the running gear with anti-fouling paint made for metal. All I had to do was remove the trim tab zincs so they could get at them completely to clean and paint. Then clean a spot on the propeller shafts for those zincs.
After putting the trim tabs back together, I turned my attention to the engines. I always start them before she goes into the water to make sure they start! I filled up a few buckets with fresh water and using a system I installed when we got the boat, I am able to run the engines on land until the buckets are empty. They started right up, always a good sound.
A couple of days later, she was launched and I moved her over to her new slip. I spent some time at the dock looking over the engines while they were running, checking for any leaks. I am happy to report that there were no leaks detected at that time.
Friends ask me why I do so much of this work myself. There are a few reasons I do it, and it’s not just to save money. My entire working life was spent as a boat operator and a marine mechanic. I take pride in my boats, especially the engine room. In fact, when selling our last boat, the buyer backed out after an extensive survey. The engine room was too clean, the surveyor insisted that the boat had sunk! But the biggest benefit to doing the work yourself may just be knowing your boat inside and out. It may come in handy someday.
Over the next few days, I want to set up the permanent dock lines in the slip, check out all the systems, including the required equipment and then clean it up. After that? Time to explore!